Hint: It Starts with the Animal Angle
During our hands-on training, we review animal positioning until every user is completely comfortable. But like most other lab equipment task, it does take some practice. Aligning the animal just right can be the difference between a great and a good fundus image. We’ve put together a quick step-by-step visual refresher to help turn you into a pro at capturing great fundus images with your Phoenix MICRON®:
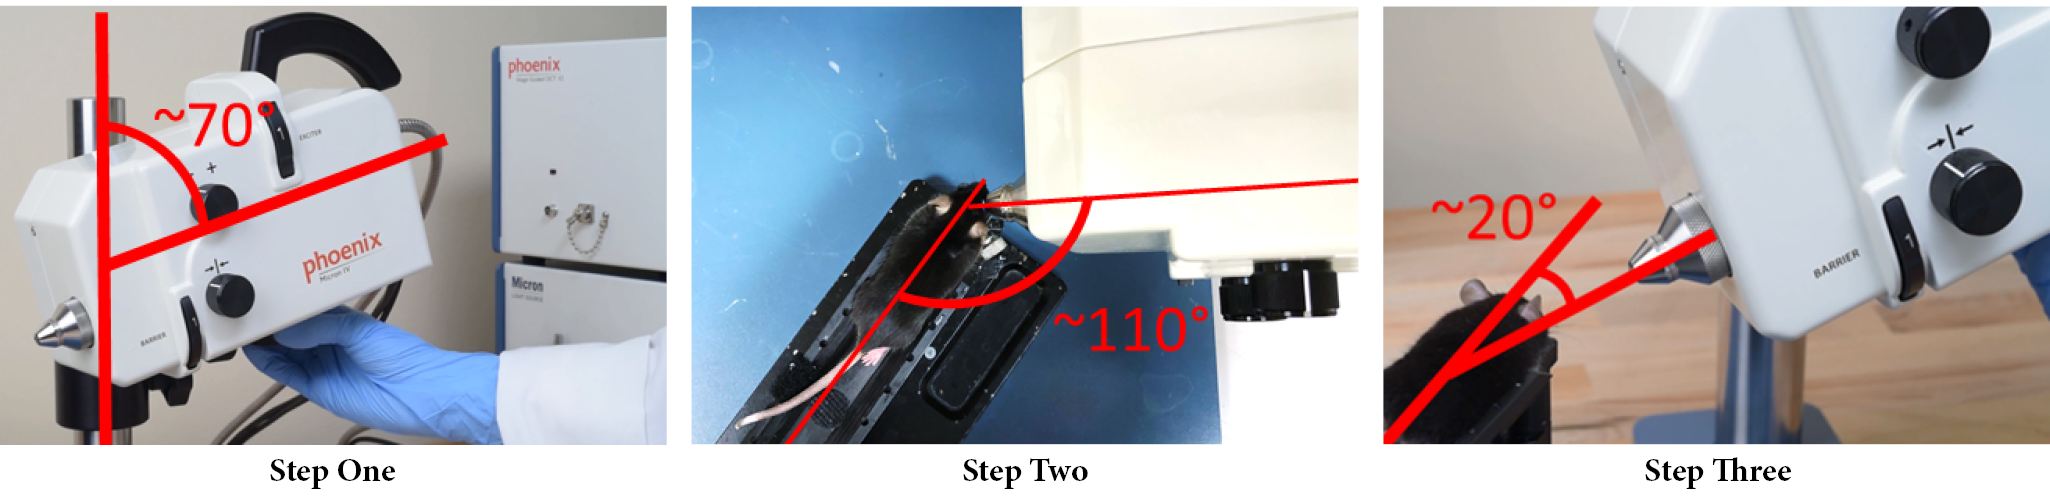
Step One: Tilt the Phoenix MICRON® until it’s at about a 70° angle from the support pole. The Phoenix MICRON® tilt is controlled by the lever on the support ring — unscrew the lever, tilt the Phoenix MICRON®, and tighten the lever to hold your adjustment. Step Two: Position the Animal Stand at about a 110° angle from the Phoenix MICRON® as viewed from above. Step Three: Manipulate the animal stand using the positioning knobs until the mouse is looking straight into the Phoenix MICRON® lens and is about 5 mm away from the lens.
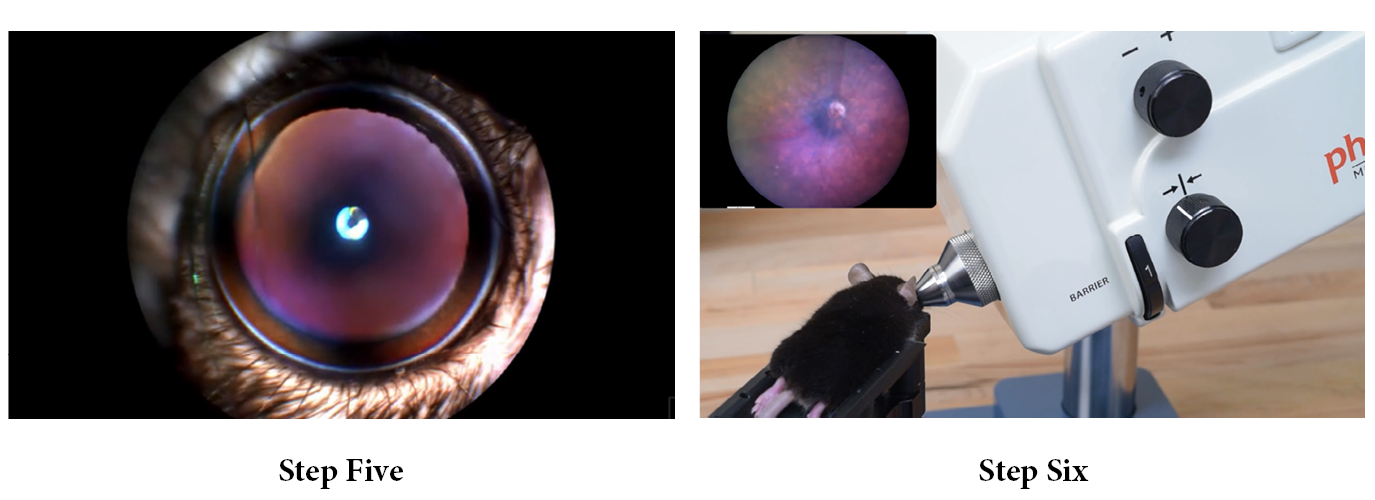
Step Four: Continue to manipulate the animal stand until the mouse eye is perfectly centered in Discover or Reveal. Step Five: Use the large knob on the bottom of the Phoenix MICRON® until you contact the eye and have a crisp, beautiful fundus image. Continue to manipulate the animal stand until the mouse eye is perfectly centered in Discover or Reveal. Step Six: Adjust the brightness and focus of the image and snap pictures!
Capturing great fundus images gets easier the more you use the Phoenix MICRON® system. Like a barista and the perfect latte art, or a chef fine tuning a dish, this will become a part of your craft as a researcher over time. Feel free to contact us for additional training or more information.
For a detailed video click here: https://vimeo.com/151929990
or for more training video details check out our resource page here: https://phoenixmicron.com/resources-researchers/